How to Format an External Hard Drive for Windows 10
While most external hard drives are already designed to work for Windows computers, there are times when you need to reformat one. You might want a drive that works with Macs and PCs, or maybe you want to partition it, which will split it up into two different formats. Here’s how to format an external hard drive for Windows 10 or partition it.

To properly format or partition any hard drive connected to your Windows 10 computer, you will use the Disk Management tool. Some hard drives may also include drivers, firmware, or format wizards, so be sure to check the user manual before formatting the hard drive. To access the Disk Management utility, click the Windows icon and type Disk Management.
When formatting or reformatting a hard drive on Windows 10, make sure to select the correct drive. If you aren’t sure, look at the available space listed under Capacity in Disk Management. Formatting an external hard drive for the first time is a two-step process; initializing, then formatting. Follow these steps to initialize and format the hard drive.
IMPORTANT: Formatting a working hard drive will erase everything, so you’ll want to pay attention to the disks listed. It should also be noted that unless you have a severe problem with the computer, do not format the C:\ drive at all, as this will erase all Windows files, forcing you to reinstall your Windows 10 operating system.
- Click the Windows icon, type Disk Management, then click Create and format hard drive partitions.
- Right-click the disk that says Not Initialized or Offline, then select Initialize Disk or Online.
- Some external USB hard drives don’t have the option to be initialized. In these cases, they get formatted and are assigned a drive letter.
- When assigning the drive letter, be sure that it’s different than that of hard drives that are currently in use.
- Select the partition style:
- GPT for hard drives with a capacity larger than 2 TB.
- MBR for hard drives with a capacity of less than 2 TB.
- Right-click the space that says Unallocated, select New Simple Volume…, and then follow the on-screen prompts.
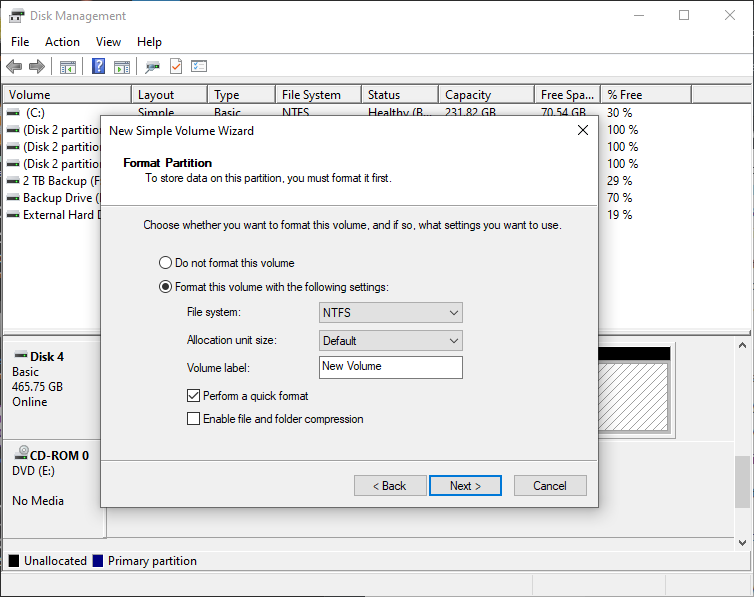
- Select the Format of the drive volume with the following settings.
- File System:
- NTFS for Windows users only.
- ExFat for Windows and Mac users.
- Allocation Unit Size: Default
- Volume Label: Enter the name you wish to label the drive as. (i.e., Studio Hard Drive.)
- Perform quick format: Check.
- File System:
What’s the difference between GPT and MBR?
When you format a hard drive on Windows 10, you are prompted to choose GPT or MBR as the partition style. While GPT is often used for hard drives with more than 2 TB of space, there are other advantages, as well.
MBR (Master Boot Record) is an older partition style that has been around for quite some time. While older Windows PC’s (that have a BIOS) run perfectly fine, it’s becoming obsolete on new PC’s (which use UEFI). The BIOS/UEFI is what loads all of the primary drivers, hard drives, as well as your Windows OS.
GPT (GUID Partition Table) is the newer partition style that has become commonplace with more modern computers, which use UEFI instead of BIOS to boot your system. The only disadvantage with GPT is that only 64-bit versions of Windows can be on the system disk (the hard drive that Windows is installed on). The system disk must have the MBR partition style if you’re running a 32-bit version of Windows.
While there are a lot more in-depth, technical differences between the two you’d want to select GPT when formatting your hard drive for the following reasons:
- You can have up to 128 partitions on the hard drive. The MBR format style can only have four partitions.
- The hard drive is larger than 2 TB.
- If using a hard drive for your system disk, GPT will store multiple copies of the boot data throughout multiple partitions. MBR only stores boot data to one partition, which means that if any of that data gets corrupted, you may not be able to boot into Windows.
To check and see what your current hard drives partition style is, follow these steps.
- Open the Disk Management utility.
- Right-click the drive you want to check, then select Properties.
- In the window that appears, click Volumes.
Credit to StreetWater for writing a short and to the point article.