How to Start a Vlog and Become a YouTube Vlogger
People like seeing the lives of others unfold. There’s something about watching other people’s daily routines and activities that is extremely appealing to many of us. And this is exactly why vlogging has become so popular, especially in the past decade. If you want to become a YouTube vlogger but have no idea how to start a vlog, you’ve come to the right place.
Although starting a vlog channel seems like a simple and easy task, there is a lot more to it than meets the eye. Before even starting to vlog, you need to dedicate some time to doing research (how to make your channel stand out), finding the right equipment (camera, microphone, tripod, lighting setup, editing software, etc.), and getting acquainted with YouTube’s guidelines so that you can avoid copyright strikes or similar issues. Then comes the actual vlogging process, and of course, editing, publishing, promoting, and so on.
Starting a vlog channel might sound more complicated than what you first thought, but don’t quit just yet – we’re here to help!
Our step-by-step guide will answer the “how to start a vlog” question and get you one step closer to becoming a successful YouTube vlogger. We’ll cover everything you need to know and provide you with vlog ideas and tips that’ll help you get your first subscribers.
Let’s help you become a YouTube vlogger!
How to Start a Vlog Step 1: Preparation
Research
Research is key for being successful in your field of choice. Start by analyzing the vloggers you like. You can do this by selecting their most popular vlogs and watching them carefully.
Pay attention to the small details:
- How do they start and end each vlog?
- Do they feature any songs in the vlogs?
- What videos receive the most engagement?
- What is their vlogging style?
- Are their videos under or over 10 minutes long?
- How do they interact with their audience?
- Do they follow a certain script or are their vlogs spontaneous in nature?
- Does their like-to-dislike ratio fluctuate or remain stagnant?
By analysing these seemingly small details, you will not only get an important insight into the world of vlogging, but improve your own vlogging style as well.
What is it that you really like about them? Is there something that annoyed you while watching a particular video? If your memory is not great, you can write down your insights, and don’t forget to go over the comments to see what their subscribers have to say as well.
This is not to say that you should copy what they’re doing, but learn from their experience and get inspired. The beauty of YouTube is that it allows you to showcase your originality and peculiar interests, so take advantage of that. Create your own vlogging style so you can stand out among other YouTubers in a similar niche.
Define your channel’s purpose
After having spent some time researching the channels you like, it’s time to make a decision about the type of vlogs you want to create.
- What are you going to do in your vlogs?
- What are you going to say?
- Is your channel going to focus solely on you or will you include your family or friends?
- Do you want it to be about one particular thing like travel or makeup or will you include more topics?
Vlogging is a mix of spontaneity and everyday activities, so you can simply start vlogging your days as they are and continue with your normal daily activities which involve cooking, getting ready, exercising, and so on. Then, as time goes by and you start gaining more subscribers, you can incorporate new fun activities that will spice up your vlogs.
You might think that continuing with your daily tasks would be boring for your viewers, but the truth is that many prefer watching people they can relate to, so don’t shy away from filming your mundane daily activities.
If you want to make a video on a specific topic but you find it difficult to come up with video ideas, look at other vloggers and draw inspiration from their YouTube channels.
You also want to think about your upload frequency. Do you want to vlog and upload on a daily basis (which can be very time-consuming) or do you want to vlog a few days a week and then compile the clips into one weekly vlog? It’s important to be consistent and upload regularly, whether that’s daily, weekly, or every 2 weeks.
Once you have an idea about what direction you want your channel to take, it’s time to find your target audience.
Find your target audience
The first step is to have a clear picture in your mind about the type of viewers you want to attract. Understanding who your target audience is and what they like/dislike is very important when starting any type of business, vlogging included. Since this is a broader topic, check out this article that’ll help you find the right audience for your YouTube channel.
How to Start a Vlog Step 2: Create a YouTube Channel
This goes without saying, but you will need to create a YouTube channel in order to start vlogging and uploading videos. The process is simple and we’ll guide you through it step by step.
How to Create a YouTube Channel
To start creating your YouTube vlogging channel head on over to https://www.youtube.com/create_channel. If you don’t have a Google Account yet, you will need to create one in order to proceed.
Create a Google account
In order to create a Google account, you will need to have an account on Gmail or Outlook.
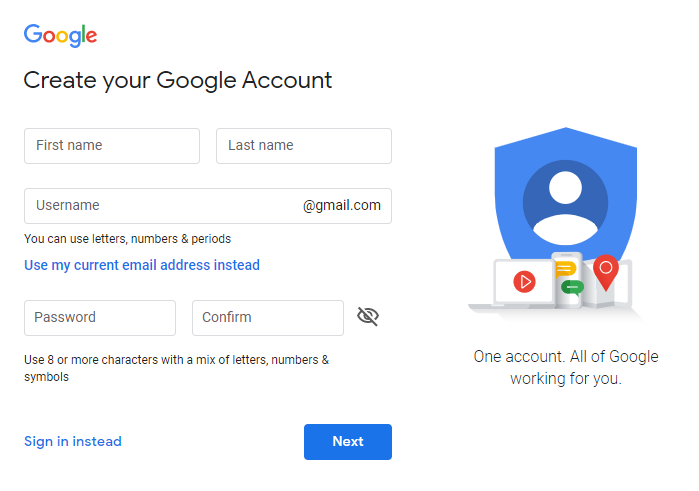
Then you need to type in your name and surname, as well as a password you want to use. Once you have filled in these boxes, you’ll receive a confirmation mail.
After you fill in your personal information like gender, birthday, and such, and you agree to the terms of use, your Google account will be created.
Then head over to YouTube and select the option ‘Create a YouTube channel’ in the top right corner.
Create a new YouTube Channel
First things first, you need to think of a name for your channel. You have the option of using your own name or creating a new name based on the type of channel you want to have.
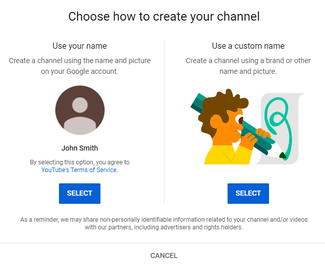
Some people prefer using their own names – like Logan Paul, Shane Dawson, or David Dobrik. Others like to be more creative and quirky with it, like Mo Vlogs. You should go with your instinct on this one, so choose whatever feels more natural to you. If you do decide to use a channel name that’s not your own, make sure it’s unique enough in order to stand out.
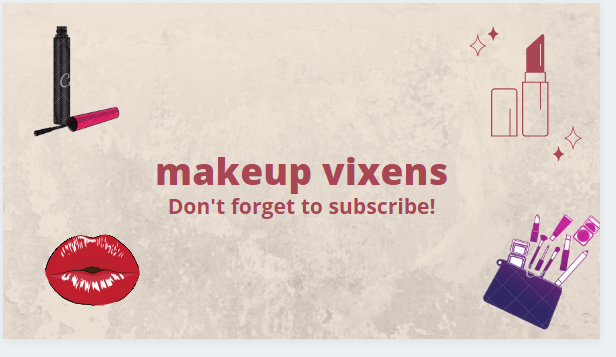
In this instance, I’m creating a makeup channel, so I will use Makeup Vixens.
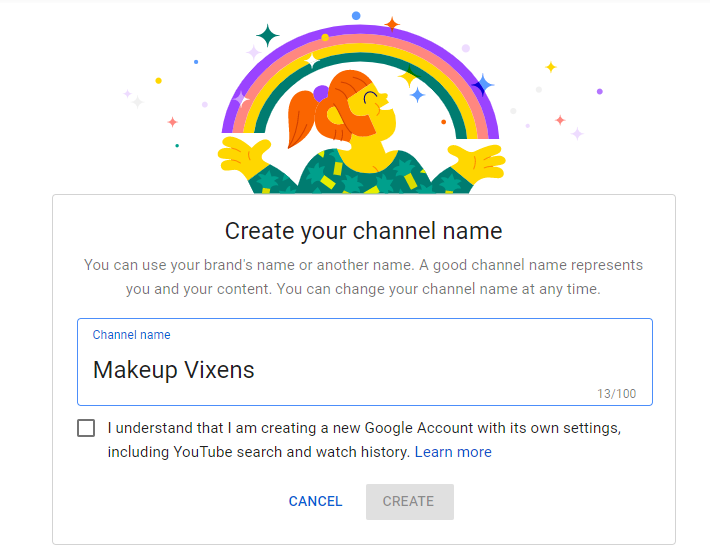
Another important thing to point out is that it’s completely normal to want to protect your privacy for whatever reason. If you don’t want your friends and family finding you on the platform, you can choose a pseudonym or a nickname as your channel name. As time passes by and you become more popular, you have the option of changing your channel name at any time.
Create Your Icon and Channel Art
From this point on, you have the option of customizing your YouTube channel. Click on the icon in the top right corner and select “Your channel”. This will lead you to your official channel page where you can customize your channel icon and your channel art.
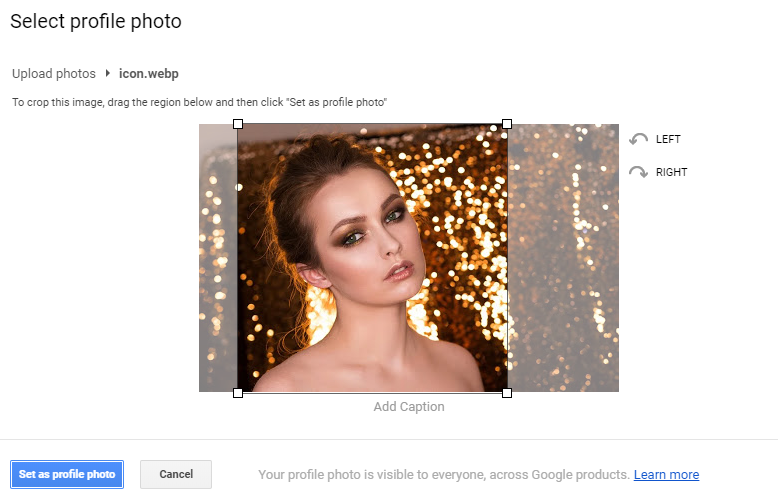
Ideally, you’d want your icon to represent your channel. If you plan on creating travel vlogs, then your icon can be a picture of you in an exotic location. For family vlogs, you can upload a photo of your family, and if you don’t like showing your personal photos, you have the option of creating a logo for free on platforms such as FreeLogo Design.
Crop your photo so that the most important parts are showing. YouTube might take some time to process it, so be patient and wait for your new channel icon to show.
The next step is to create channel art. You can select this option after clicking on “Customize channel”.

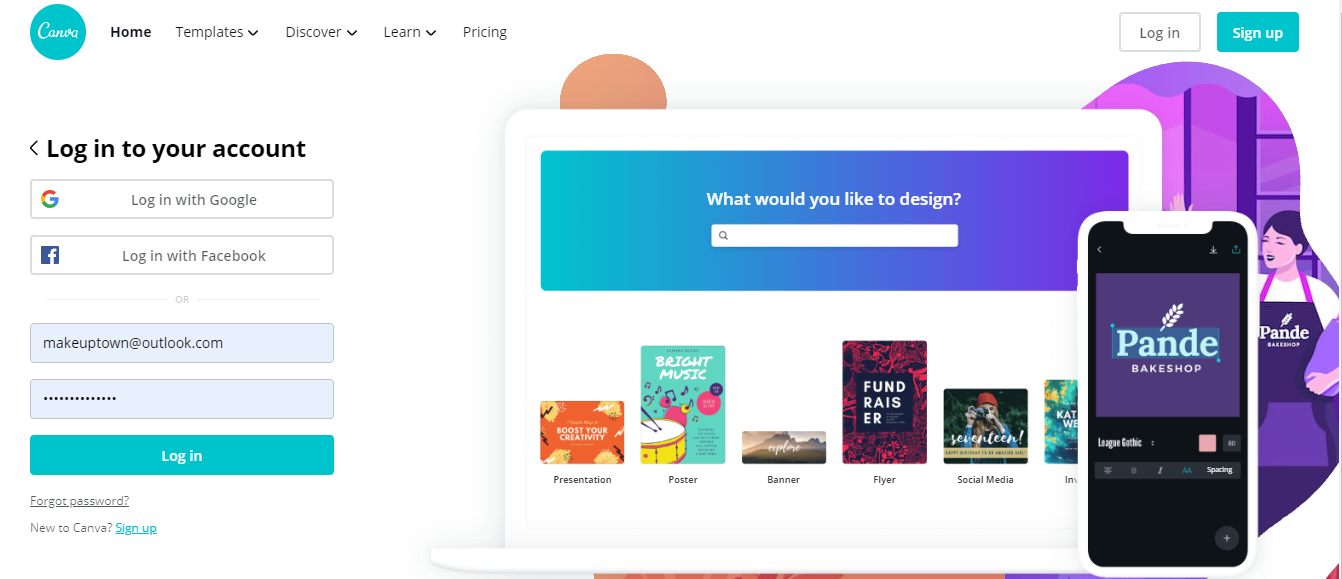
You can use certain apps like Canva in order to personalize your photo. It’s important to create eye-catching channel art that will grab your viewer’s attention. After all, it’s the first thing YouTube users see after clicking on your channel. If you don’t have an account on Canva, you will need to create one in order to proceed.
Once you sign in, a “Start your first design” window will pop up.
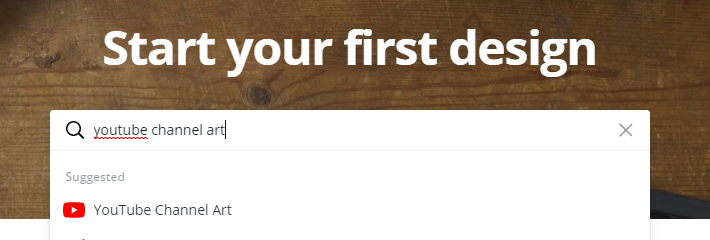
You can search “Youtube Channel Art” and it will lead you directly to templates that can help you in creating the design you need.
You have the option of using pre-made templates that you can find on the left.

hen, you can fill out the boxes with specific information about your channel, add text, elements, and additional photos.
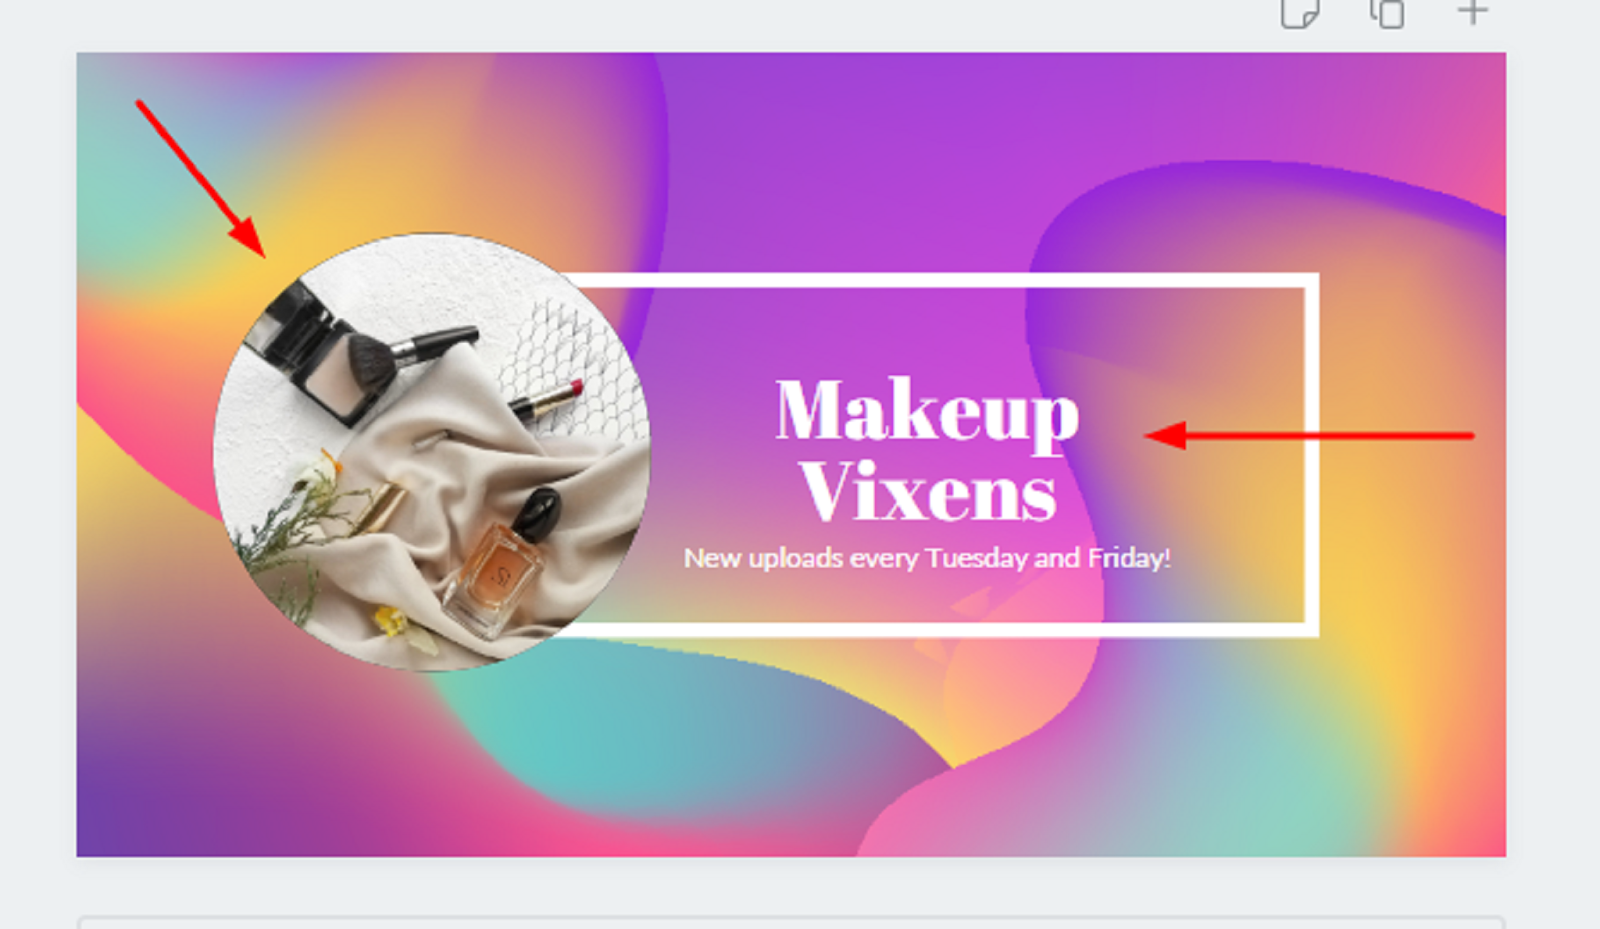
Or, you can select one of the available backgrounds and create your own channel art from scratch. Feel free to add text, elements, or even your own photos to personalize your channel art.
Once your design is done, you can download it and proceed to upload it to YouTube. 
When your photo is downloaded, click “Upload photos”, then “Select a photo from your computer”.
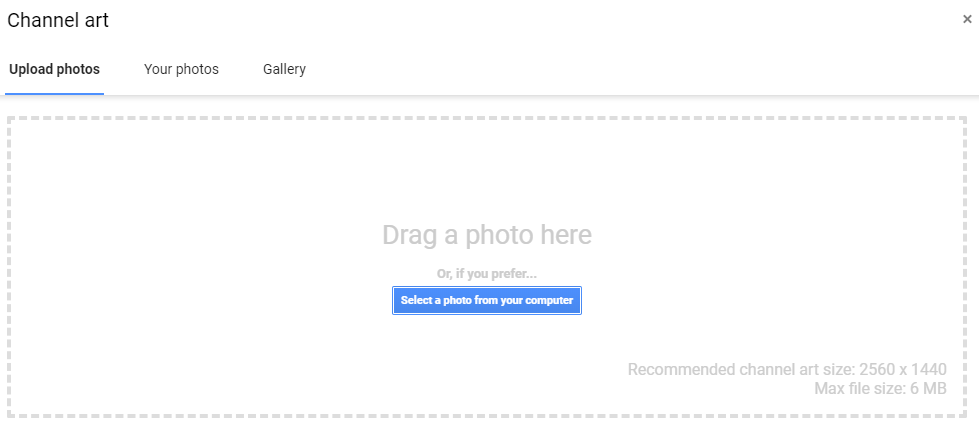
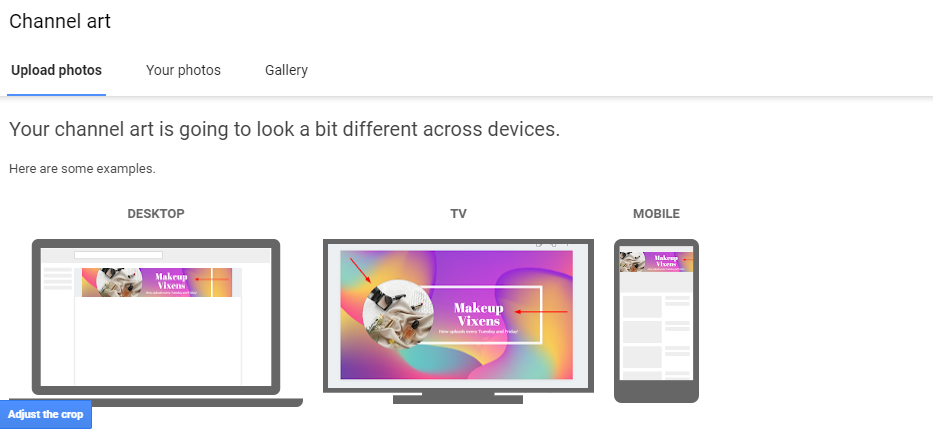
YouTube will give you a brief warning about the way your channel art will appear across multiple devices.
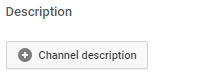
Optimize your channel’s description
The next step is to come up with a fetching channel description. You can change your channel’s description under the “About” tab on your Channel landing page.
This is one of the best ways to attract your target audience to your channel. Remember to use specific keywords in order for your channel to come up in search engines, especially in the first couple of sentences that show up on YouTube’s landing page. Make sure to repeat the keywords a couple of times.
If you’re creating a vlog channel that features only you, simply describe yourself in a few sentences. Introduce yourself, tell your viewers where you come from, what your interests and hobbies are, and so on. Your channel description needs to contain the purpose of your channel, so explain what your viewers can expect from your videos. This also relates to the point of knowing your audience and describing what they’d want to see from you.
There are plenty of affiliates to join to promote with vlogging after you get the hang of it. Check out affiliate programs of Diggity Marketing.
How to Start a Vlog Step 3: Get The Right Equipment
Viewers prefer watching videos in high quality, so getting the right equipment is important as well. That being said, if you don’t have a big budget at the beginning of your YouTube career, we’ve got you covered.
Available at Matrix Warehouse online shop.
Home Vlogging Kit with Microphone Holder, Pop-Filter, Phone Holder, and 3.5 Inch Ring Light

The all-in-one Volkano Insta Desk Streaming Kit is all you need to get streaming and vlogging like a pro. Get perfect lighting with the built-in 9 cm / 12 inch LED Ring light you adjust the settings for that perfect control of brightness and colour temperature of your lighting to get that ultimate video or photograph experience. Look flawless in your selfies or your selfies, tik-toks, broadcast – no matter what the external lighting situation is, and make sure you’re always in-shot with the adjustable phone holder. Say goodbye to uneven sound with the built-in Mic Holder with Pop Filter and always be in-frame with the adjustable phone holder arm. Ideal for any desk or countertop while you game, cook, or craft for your online followers.
Features
- Adjustable Mobile Phone Holder fits any phone width up to 6.2”
- The 9cm Ring Light helps improve your lighting conditions
- Includes a Microphone Holder, Pop Filter, and Vibration Damper
- Ideal for Vlogging and Streaming
- USB Powered by any USB wall charger, power bank, or any other USB power outlet. True mobility on the go!
- 9cm / 3.5 inch LED Ring Light
Specifications
- 12 inch selfie fill light with tripod and phone clip
- Power Supply: USB Cable
- Voltage: 5 V Power: 15W LED
- LED Colour temperature: 3200K – 6500 K
- Brightness: > = 4800 LUX
- Tripod length: 180 cm (Max) / 70 inch
- Folded length: 35 cm / 13.7 inch
- USB Cable length: 2.9 m / 9.5 ft
- Light colours: White + Yellow + Mixed light 9 brightness levels
Included in the Pack – Get yours from Matrix Warehouse online store here.
- Volkano Insta Series Desk Stand Ring Light including:
- Microphone Pop Filter
- Microphone Anti-Vibration Damper
- Instruction Manual
Finding the right equipment on a low budget
You don’t need to spend hundreds or thousands of dollars on expensive equipment to start vlogging, but having a good camera is a must. Use our buyer guides if you need help finding a vlogging camera. A flip screen is a nice feature that’ll allow you to see yourself while filming, which is beneficial for making sure you’re in the right frame and in focus. You can find the best options in our flip screen camera guide.
Quality sound is another important aspect, but if you don’t have the money to invest in a high-quality mic, you can find some low budget mics that will do the job.
Another option would be to use your phone in the early stages of your YouTube channel or borrow a nice camera from someone you know.
Be creative and improvise with your equipment. This varies depending on what kind of equipment you will need for filming, but you can try things like using books or boxes as a tripod. Another good tip is to use free editing software. As you start gaining more subscribers, feel free to invest in better equipment.
Finding the right equipment on a higher budget
If you have enough budget, you can also invest in additional equipment such as a nice camera (like the Canon m50), a high-quality microphone, a tripod, wind muffler, or artificial lighting.
How to Start a Vlog Step 4: Prepare Your Video
Create a content plan
This step includes brainstorming ideas about what exactly you want to film.
What is it that you want to film and include in your vlogs? Come up with a couple of different video ideas and write everything down. Creating a content plan at least for the first month will take the pressure off, so filming videos will go much more smoothly.
It’s always better to make impromptu, natural vlogs and play it by ear, and then use your editing skills to make it as you envisioned it to be. However, speaking naturally and being spontaneous in front of a camera can be a struggle for many in the beginning, so we advise you to create reminders or scripts about your first few videos and take it from there.
Now that you have your ideas, your equipment, and the right attitude, it’s time to hit that record button!
How to Start a Vlog Step 5: Film a Vlog
Film a Vlog
Once you have a good idea of what you want your vlog to look like, it’s time to start vlogging. Here are our favorite tips to get you started.
Tips for recording your first vlog
- Stay calm and don’t over plan it. Overplanning will ruin the natural spontaneity that comes with vlogging. Press the recording button and speak your mind. Go about your day as you would normally and see what comes out of it. Being spontaneous is a good thing for vlogging, and you can always cut parts and edit your videos after.
- Good lighting and audio quality: Make sure to speak clearly without being silent for too long (don’t worry if you make long pauses at first, you can always edit them out!). Try to record the video in daylight (in front of a big window) or with artificial lights if you want to record at night.
- Create a preview for your video: Creating a preview or including a funny scene will give your viewers a sneak peek of the video, increasing their interest to see it.
- Don’t forget to interact with your viewers: Vlogging allows you to connect with your audience on a more personal level. Engage with your viewers, ask about their opinions, remind them to leave comments and subscribe, and be sure to respond to their comments when they do so.
- Sign off with a unique personal phrase or gesture: This helps you personalize your videos and become more memorable. In fact, a lot of successful vloggers and YouTubers have their own unique phrase or gesture they use to end their vlogs, like Pewdiepie’s fist bump.
Make Your Vlog Interesting
People watch vlogs for their own entertainment, so it’s very important that your vlogs are interesting.
It’s difficult to define what makes a vlog interesting since it’s relative to the person, but here are some general pointers:
- Be original. If your vlogs are the same as thousands of other vlogs it will be difficult to attract a lot of viewers.
- Be genuine. YouTube viewers appreciate authenticity. If you’re constantly putting on a show without letting your true colours come through, you will soon lose your audience’s interest. If you remain genuine, your audience will be automatically more drawn to you, regardless of what kind of activities you’re doing. Which leads us to our next point.
- Be yourself. Even though you should always try to be as interesting, unique, and entertaining as possible, you should always be yourself! Your peculiar interests, hobbies, and style are what will make you stand out from the crowd. It’s the little things that make you distinctive as a YouTube personality, so be proud of them and include them in your videos.
How to Start a Vlog Step 6: Edit Your Vlog
Learn how to use editing software
If you think you have enough clips to make a vlog, go ahead and start editing your footage and putting the clips together.
You can use various programs for editing; some computers even come with their own free video editing software. The type of programs available will depend on whether you have a Mac or a Windows. You can watch tutorials on YouTube in order to get the hang of editing.
Use our vlog editing software guide to find the best editing program for you (free or paid).
Edit your vlog
When editing, select only the clips you find interesting or entertaining to avoid making the vlog a snoozefest. If you want to add a personal touch, create a specific intro, and outro for your videos.
The length of your vlogs will vary depending on whether you’re making daily vlogs or longer vlogs. There are many YouTube trends like weekly vlogs that are longer in duration, in which case feel free to film more footage and make your videos around 30 minutes or longer. Don’t be afraid of uploading longer videos; after all, you will be filming a weekly vlog which requires more footage by default.
There are even some perks to uploading longer videos, like the ability to insert more ads, which means you will make more revenue off your videos after surpassing 1000 subscribers.
If you have the budget, hiring an experienced editor is also an option. Hiring an editor means you will have more time to dedicate to creating content and coming up with new video ideas. Not to mention, videos edited by an experienced professional always have a better flow and look more put together – unless you have the time and you enjoy the editing process.
It’s important to note that if your videos exceed 15 minutes, you will need to verify your YouTube account via phone.
Export The Finished Video
The next step is exporting the video, which includes finalizing your video and uploading it to YouTube.
Before proceeding to export the video, we highly recommend you to read YouTube’s recommended upload video settings.
There are a few things you need to keep in mind regarding video exporting. Make sure your wifi is fast – there’s nothing more annoying than having a slow internet connection while trying to export a video. Of course, fast wifi won’t be available to you at all times. If you’re traveling often, then you might encounter hotels or accommodation that doesn’t have fast wifi. However, if you’re planning on exporting your videos from your own home, then investing in fast internet is a good idea.
If you’re using apps like Adobe Premiere Pro, then be aware of the possibility that the app might crash at any point. If this does occur, don’t despair! You can always troubleshoot the app and try again.
How to Start a Vlog Step 7: Upload Your Vlog to YouTube
How to upload your vlog
Now your vlog is recorded, edited, and ready to be uploaded to YouTube, it’s time to get the vlog online!
Log into your YouTube channel and click the upload icon located on the right of the search bar or go directly to youtube.com/upload.

Then select your exported video file or drag your video file directly into the upload box.
Your video will now start uploading and you can follow the next few steps to complete your video listing. Your video will only go public after you hit the “Publish” button.
Choose and Optimize Your Video Title
Your title should be short (under 50 characters), catchy, and descriptive. You should strive to find a good balance between making the title creative and unique and communicating what the video is about. By doing so, your title will stand out among the sea of YouTube videos but it will still tell the viewer what they can expect from it. Remember to use keywords in the title as well.
It’s okay to make the title attention-grabbing but don’t make it misleading or clickbait! Viewers don’t like this and will leave dislikes and negative comments. If you often use misleading titles YouTube might even ban your account for violation of their rules.
Choose or Create a Video Thumbnail
Your thumbnail plays a big role in someone’s decision to click on your video, so make it visually appealing and illustrative regarding the topic of the video. For instance, if the subject of your video is something silly, then you can convey that by making a silly face. If you’re talking about paranormal topics in your vlog, then you can make a scary face and put it as a thumbnail, along with some ghost emojis.
Your thumbnail should make people curious so they want to watch your vlogs.
You can either choose a still frame from your vlog after uploading the video to YouTube or create a custom thumbnail.
Just remember that all thumbnails must follow YouTube’s guidelines or YouTube will disable your ability to upload a custom thumbnail.
Optimize your video description
The final part of your video listing is your video description.
Your video description tells YouTube what your vlog is about so they can rank it in their search engine.
Try to write a description of 300 to 500 words and include some keywords (but don’t go overboard). This helps YouTube understand your vlog better and recommend it to the right audience.
Here is an example of a video description from Priscilla Lee’s vlog.

Tag your video
Tagging your video the right way is crucial if you want it to appear in YouTube search results. If you want your video to rank, keep your tag words non-specific. You want to use words that other people will type in the search bar, so refrain from using specific proper names like “Charles” for instance, no matter how related they are to your content. Try to stay away from attention-grabbing tags that have nothing to do with your videos.
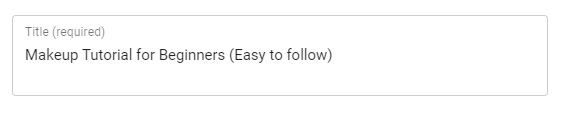
Here’s an example of our first vlog about applying everyday makeup.

A useful tip to know is that you can get a hint about what the viewers want to see by typing a word in the search bar and reading YouTube’s auto-suggestions. You can also use a tag generator app like Rapidtags to create SEO-optimized tags.
How to Start a Vlog Step 8: Promote Your Videos
Now that you know how to start a vlog and your video is uploaded to YouTube you are done, right? Not yet! Every minute, over 300 hours of video are uploaded to YouTube. If you want to get views you’ll need to effectively promote your vlogs.
Share Your Vlog on Social Media
The easiest way to promote your new vlog is by promoting it on your own social media. Share the link on your Facebook, Twitter, Instagram, or any other social media websites you use, and ask your friends to share them as well.
Build an Audience
The key to YouTube success is building a loyal audience that’s regularly watching and engaging with your videos. This helps build your reputation on YouTube so your vlogs are ranked higher and appear in the ‘recommended videos’ section.
Here are a few tips on how to build an audience:
- Always be transparent with your audience and create the kind of content you’d like to see.
- Make sure you create a schedule for yourself and stick to it. Consistent uploading is one of the best ways to gain subscribers.
- Collaborate with other YouTubers and brands.
- Make sure your channel is SEO-optimized so that you can attract more views.
- Build a community by engaging with your audience on social media as well.
Keep your Engagement High
Videos with high engagement rank better. Here are some things that you can do to keep your engagement rate high:
- Put some effort into creating your thumbnails.
- Post consistently.
- Keep your videos short in the beginning.
- Promote your vlogs tirelessly.
- Tell your viewers to leave a comment (you can ask them a question they’d like to respond to).
- Reply to comments.
Collaborate With Other Vloggers
You can also collaborate with other vloggers to cross-promote each other, but this only works after you have at least a few thousand subscribers. There are a lot more ways to promote your YouTube channel and vlogs.
Ask your viewers to subscribe to your channel (and hit the notification bell)
Don’t forget to remind your viewers to subscribe to your channel and hit the notification bell, either at the beginning/end of your videos or in your video description.
How to Start a Vlog Step 9: Keep Going!
Post consistently
Like we mentioned earlier, being consistent with your uploads will inevitably lead to more subscribers.
YouTube rewards channels that post videos consistently by putting them higher on the search list. The more you upload, the bigger the chances of your potential viewers finding your channel. Additionally, your subscribers will appreciate the fact that you’re loyal and will recommend your videos to other people.
Be patient
In all likelihood, your vlog won’t have thousands of views at first, but don’t let that stop you. You need to be patient. Set a schedule for how often you want to upload new vlogs and stick to that schedule no matter what.
Keep networking with other YouTubers, bloggers, and people on social media, and ask for collaborations. That way your channel will grow a lot faster.
Don’t give up! Every vlogger that now has millions of subscribers started from zero at some point! Keep getting better at vlogging and editing, keep uploading, and keep promoting. You never know when your big break might come.
How to Start a Vlog Step 10: Monetize
Apply to the YouTube partnership program
Once your subscriber base grows and you start getting more views, it’s time to make some money off of your vlogs.
Apply to the Youtube Partnership Program so you can start earning money from ads shown before or during your videos.
To become a partner you need to meet two requirements:
- Have more than 4,000 public watch hours in the last 12 months.
- Have more than 1,000 subscribers.
Beware: YouTube does not let you monetize videos with copyrighted material so don’t include any songs you don’t own the rights to.
Try affiliate marketing
You can get affiliate links from Amazon or similar platforms like LinkShare.com. Affiliate marketing is a great way to make money off your videos. You can integrate it easily, for instance, if you’re reviewing a certain product in your video or if you mention a product in your video. Then you can simply link to the product in your description and make money if one of your subscribers decides to buy it.
Find sponsors
If you gain enough subscribers, chances are companies will reach out to you in order to sponsor you. But what if you’re not there yet?
Many people don’t know this, but you can reach out to companies that you want to be sponsored by. Simply send them a polite email where you explain your YouTube channel and the type of videos you make and kindly ask them to sponsor one of your future videos. The worst that can happen is that you get a no. If that’s the case, you can always try with a different company.
Create and sell your own products
Most YouTubers create their own merch. This could be anything from t-shirt designs with your logo or coffee mugs that contain your catchphrase. When you gain enough subscribers, you should think about making your own merch and selling it to your audience. Loyal fans would want to have something that represents your channel, so it’s a win-win situation. Not to mention, if they wear the merch in public, you get free marketing.
Create a Patreon account
The final step would be to create a Patreon account. This will allow your subscribers to support your channel in addition to watching your videos. In turn, you can create special video content for them as a way to thank them.
It’s important to note that you need to have at least a few thousand subscribers in order to create a successful Patreon account.
We hope that you found our guide on how to start a vlog useful. Good Luck!
FAQs
How much money can you make from vlogging?
The amount of money you can make from vlogging will depend on a couple of different factors: how big your audience is, how many views you get per video, the watch time, whether you have any sponsorship deals, and how many ads you put in your videos.
Essentially, you will be paid on a per-view or ad-click basis, so the more views you get, the more money you can make. Keep in mind that YouTube keeps around 45% of the ad revenue, and you also need to pay taxes.
On average, you will receive $18 per 1,000 ad views, which translates to anywhere from $3 to $5 per 1000 views on a video. That being said, if you want to learn how to make a vlog, your motivation should be more than just money if you want to succeed.
Can I start vlogging with a phone?
If you don’t have the money to invest in a professional video camera, you can still film vlogs and upload them to YouTube. Nowadays, phones have high-resolution cameras, so starting a vlog channel even with just your phone is easier than ever. Not to mention, it’s also way more convenient than carrying around a large camera with you everywhere you go.
You can also combine footage from your phone and your camera. If your phone has a good quality camera, then you won’t even notice the difference in the final version of the video.
Why is vlogging so popular?
Vlogging is popular for many different reasons. For starters, it appeals to us as regular human beings. Seeing someone do mundane things like folding their laundry is interesting to us because we get an insight into someone else’s life.
We can easily relate to people who are similar to us, interact with them, and see their lives unfold. Vloggers usually build a large community, so interacting with other subscribers is also a part of the appeal because it creates a sense of community. This is why more and more people want to learn how to create a vlog of their own.
Credit to VLOGGING PRO for such a brilliant and informative article on how to start a Vlog.